Getting online is essential today, and the most convenient way for most computer users is to connect to a Wi-Fi network. Luckily, Windows 10 and Windows 11 make the process incredibly easy. Whether you’re setting up a new computer or need to switch networks, this guide will have you connected in no time.
Prerequisites to connect to a Wi-Fi network
Before you begin, make sure you have the following:
- A Wi-Fi-enabled computer: Most laptops and desktop computers have built-in Wi-Fi capabilities. If yours doesn’t, you can purchase a Wi-Fi adapter.
- Network Name (SSID): This name identifies your Wi-Fi network.
- Network Password: This is required to secure your Wi-Fi network and prevent unauthorized access.
Steps to Connect to Wi-Fi in Windows 10 and Windows 11
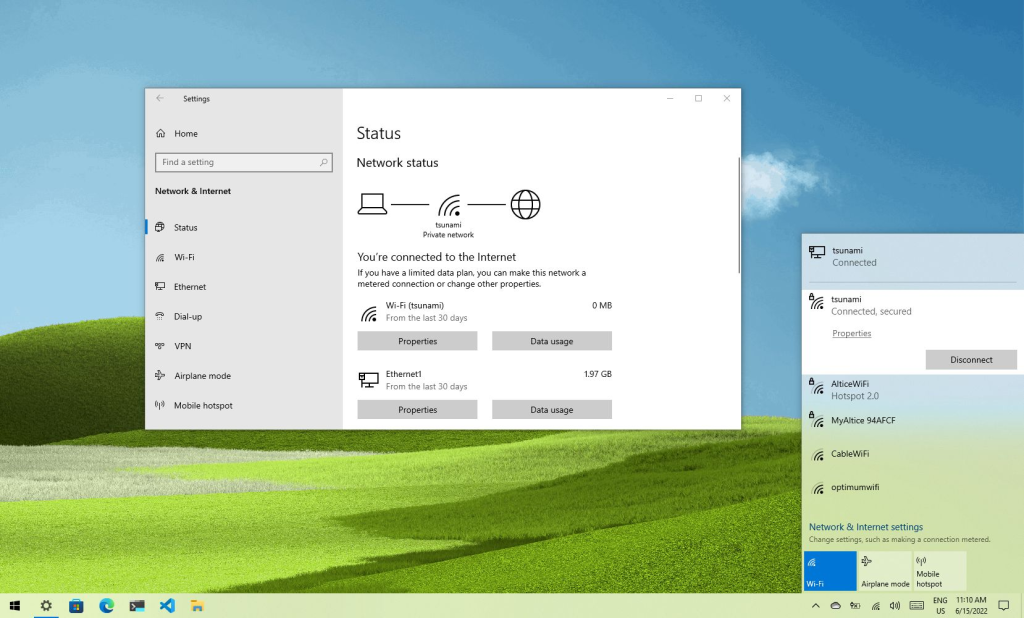
- Locate the Wi-Fi Icon: Find the Wi-Fi icon (or Network icon) in the notification area of your taskbar. It usually looks like a series of ascending bars or a globe.
- View Available Networks: Click on the Wi-Fi icon to see a list of available Wi-Fi networks within your computer’s range.
- Select Your Network: Click on the name of the Wi-Fi network (SSID) you want to connect to.
- Enter Password: Enter your network’s password (security key) in the provided field. Be sure to type it carefully, as passwords are case-sensitive.
- Connect: Click the “Connect” button. Windows will attempt to establish a connection with the Wi-Fi network.
- Check Connection: If the connection is successful, you’ll usually see a “Connected” message next to the network name. It might take a few seconds for the connection to be fully established.
Note: Make sure you are within range of the Wi-Fi network you want to connect to.
Additional Settings
- Connect Automatically: Most of the time, you’ll want the “Connect automatically” box checked. This ensures your computer seamlessly connects to the preferred network whenever it’s in range.
- Hidden Networks: If your network’s SSID is hidden, select an option like “Other Network” or “Hidden Network” and manually enter the SSID and password.
Troubleshooting
- Incorrect Password: Double-check you’ve entered your password correctly. Remember, it’s case-sensitive.
- Out of Range: Ensure you’re close enough to your Wi-Fi router to receive a strong signal.
- Airplane Mode: Ensure airplane mode is turned off, as it disables wireless connections.
- Outdated Drivers: Out-of-date Wi-Fi drivers can cause issues. Visit your computer or Wi-Fi adapter manufacturer’s website to download the latest drivers.
Prerequisites to connect to a Wi-Fi network: A computer with Windows 10 or Windows 11 operating system.
Access to a Wi-Fi network.

Steps to Connect to Wi-Fi in Windows 10 and Windows 11:
Click on the Wi-Fi icon in the system tray.
Select the desired Wi-Fi network from the available options.
Enter the network password, if required.
Click on the Connect button.
Wait for the computer to establish a connection to the Wi-Fi network.
Note: Make sure you are within range of the Wi-Fi network you want to connect to.
To connect to a Wi-Fi network in Windows 10 or Windows 11:
Click on the Wi-Fi icon in the system tray.
Select the desired Wi-Fi network from the available options.
Enter the network password, if required.
Click on the Connect button.
Wait for the computer to establish a connection to the Wi-Fi network.
Advanced Options: Manually Connect to Wi-Fi in Windows
While the above method is the usual way to connect, there are cases where a manual setup might be required:

- Open Network and Sharing Center: Search for “Network and Sharing Center” in the Start menu and open it.
- Set up a New Connection or Network: Click “Set up a new connection or network.”
- Manual Connection: Choose “Manually connect to a wireless network” and click “Next.”
- Enter Network Details: Fill in the network name (SSID), security type, encryption type, and security key (password).
- Save and Connect: Click “Next” and follow any remaining on-screen instructions.
Related Posts

How to Easily Fix Common Internet Connection Problems: A Troubleshooting Guide in 5 minutes
Experiencing slow internet speeds, spotty Wi-Fi, or complete connection drops?…
How To: Fix a Corrupted Windows Installation (And Save Your Sanity)
A corrupted Windows installation can be a frustrating experience. From…
How To: Reinstall Your Operating System (Windows, macOS)
Sometimes a fresh start is the best solution for serious…